A damaged crisper drawer can turn everyday food storage into a frustrating guessing game. Produce rolls beneath the shelf. The drawer catches halfway. A small crack spreads near the handle. For many households, Fridge Crisper Drawer Replacement is a practical repair, not a reason to replace the entire refrigerator.
Doug Rogers, an experienced appliance-repair professional, offers a useful warning: “Do not force a drawer that is misaligned; inspect the tracks and guides first.” That advice matters because a broken wheel, warped rail, or overloaded compartment may cause the original failure. This 2026 guide explains how to identify the correct drawer, compare dimensions, and check compatibility with your refrigerator model. It also considers humidity-control sliders, removable covers, rollers, and replacement clips.
Measure carefully. Small differences matter.
The process usually begins with the model number, not a visual guess. A drawer may look identical but use different side rails or mounting points. Genuine manufacturer parts can provide a closer fit, while reputable aftermarket options may reduce cost. Still, cheaper is not always better. Plastic thickness, wheel quality, and edge finish deserve attention.
Some repairs are surprisingly simple. Others are not. A cracked shelf support or damaged cabinet track may require more than a drawer replacement. That is where this guide encourages caution and honest assessment. I have seen minor alignment problems mistaken for defective parts, and that mistake wastes both time and money. Use this guide to make a measured decision, protect delicate produce, and restore smooth, reliable refrigerator storage.
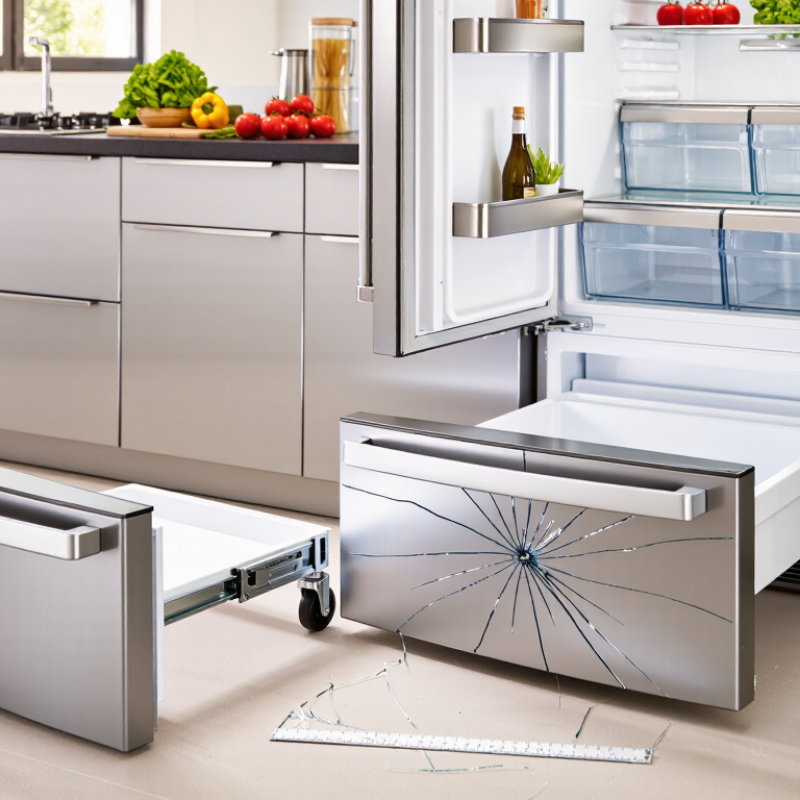
2026 Top Fridge Crisper Drawer Replacement Guide: Identify Crisper Drawer Failure Using USDA’s 40°F Refrigeration Standard
A crisper drawer should protect produce from drying, crushing, and unstable airflow. However, a damaged drawer does not always cause unsafe temperatures. The USDA recommends keeping your refrigerator at 40°F or below. Use a separate appliance thermometer, placed near the drawer, for a dependable reading. Built-in displays can be inaccurate.
Look for cracks, warped plastic, broken rollers, or a drawer that will not close fully. Check whether its cover sits evenly. A loose cover may allow excessive cold air to reach leafy vegetables. Ice buildup, wet lettuce, or limp carrots can show poor humidity control. They may also indicate blocked vents or a failing door seal.
I once blamed the drawer too quickly. The real problem was an overfilled refrigerator blocking airflow. That mistake is worth remembering. Remove spoiled food, clear nearby vents, and measure the temperature for several hours. If the reading stays above 40°F, treat the issue as a refrigeration problem, not merely a storage problem. Replace the drawer when physical damage prevents smooth movement or proper closure. Choose a compatible food-safe replacement, and confirm its dimensions before ordering. A small gap can change airflow. Never rely on appearance alone.
Use a refrigerator thermometer to measure the crisper drawer after the appliance has stabilized. A drawer consistently above 40°F may indicate restricted airflow, a damaged seal, poor temperature control, or a faulty drawer assembly. Temperature alone cannot confirm that replacement is required.
USDA recommends keeping refrigerators at 40°F or below. The FDA Food Code uses 41°F or below for cold holding. If perishable food has remained above 40°F for two hours or longer, follow USDA food-safety guidance and discard it.
Sources: USDA refrigeration guidance and FDA Food Code.
2026 Top Fridge Crisper Drawer Replacement Guide
Replacing a refrigerator crisper drawer in 2026 starts with measurements, not appearance. A drawer can look identical yet fail because its rails sit two millimeters apart. Measure the opening width near the front, center, and rear. Record the smallest number. Cabinets are rarely perfectly square. Measure depth from the back wall to the inside front edge, excluding the door seal. For height, check the clear opening and the drawer body separately. Include the front panel only when comparing overall clearance.
Rail spacing needs special care. Measure center to center between rail tracks, not outside edge to outside edge. Also note whether the rails are side-mounted, bottom-mounted, or molded into the drawer. Photograph the rail ends and screw locations before removing anything. This record helps confirm compatibility when product descriptions use vague dimensions. An experienced repair check should include the stop tabs, wheel position, and rear hooks. These small parts often decide whether a replacement slides smoothly.
Use a rigid tape measure and write measurements in millimeters. Repeat every measurement twice. Do not trust a single reading. Temperature, tilt, and worn rails can change the result. Leave enough clearance for the drawer to open without scraping the door or shelf. I once measured only the front width and ordered a drawer that narrowed at the rear. It looked right. It did not fit. That mistake was avoidable. Compare your notes with the listed width, depth, height, and rail spacing before purchasing. Exact numbers matter more than a familiar shape.
Replacing a refrigerator crisper drawer requires more than matching its dimensions. Material affects durability, visibility, and cleaning.
Food-grade polypropylene handles daily impacts well and stays relatively light. ABS offers greater stiffness, but it may crack after repeated cold-temperature stress. Clear polycarbonate improves visibility, though scratches appear more easily.
Humidity control deserves closer attention. USDA FSIS recommends keeping refrigerators at 40°F (4°C) or below for food safety. UC Davis Postharvest Technology Center lists many leafy vegetables near 95–100% relative humidity.
Choose a drawer with a sliding vent, not a decorative cover. Keep the vent mostly closed for lettuce, but open it slightly for apples or berries.
My own test is simple: place a paper towel inside overnight. Heavy moisture suggests poor airflow, while limp greens suggest excessive ventilation.
Load rating is often overlooked. Many replacement drawers lack a clearly published capacity, and there is no universal household crisper standard.
Request a static load figure from the seller, measured in kilograms or pounds. Check the drawer rails, corner supports, and underside ribs. A drawer that flexes under two full bottles may fail quickly.
Measure the opening, rail spacing, depth, and stop position before ordering.
“Universal fit” is not always universal. That label deserves skepticism.
2026 Top Fridge Crisper Drawer Replacement Guide
A crisper drawer may look universal, but small differences can prevent a proper fit. Check the refrigerator’s complete model code, including letters and suffixes. Then compare it with the replacement drawer’s OEM part number. Do not rely on appearance alone. Depth, rail spacing, front-panel shape, and stop positions can vary by production year.
Measure the old drawer at its widest points. Record the rail width and the distance between support tabs. Photograph molded numbers before ordering. These details help confirm compatibility when online listings contain incomplete information. A common mistake is matching only the refrigerator series. I have seen that approach overlook regional codes and revised drawer designs. Recheck everything.
Food contact matters. Choose a drawer with documented food-contact suitability for cold storage. Ask for material information, supplier declarations, and applicable NSF food-contact documentation when required. NSF certification is not automatically proven by a generic “food safe” claim. The drawer should resist cracking, staining, and odor absorption under normal refrigerator temperatures. Avoid unverified plastics, painted interior surfaces, or parts with unclear manufacturing details. This is where caution pays. Requirements can differ by region and installation setting, so confirm current guidance with the appliance documentation or a qualified food-equipment professional. Before installation, wash the drawer with mild detergent, inspect every edge, and test its movement without food inside.
A replacement crisper drawer should glide smoothly, sit level, and close without forcing. Unplug the refrigerator before removing the old drawer. Empty nearby shelves, then lift the drawer gently from its rails. Inspect the rollers, supports, and cabinet opening for cracks or hardened food residue. Clean these areas with mild soap and dry them fully. Compare the new drawer with the old one before installation. Small differences in rail position can affect alignment.
Insert the drawer while keeping both sides at the same height. Engage each rail evenly, then push the drawer inward until the stops connect. Do not slam it. Pull it out halfway and check for side-to-side movement. A slight wobble may seem harmless, but it often causes uneven sealing and poor sliding. Close the drawer slowly. Its front should meet the cabinet evenly, with no visible gap. If the drawer includes a gasket or humidity-control seal, check that it touches continuously around the opening. My first test would be simple: open, close, and repeat several times. Listen for scraping.
Tips: Keep the rails dry and free from crumbs. Do not apply random oil, because it can attract dirt or damage plastic parts. Place a small, lightweight container inside the drawer and test it again. If the drawer shifts, remove it and realign both rails rather than forcing the front. Condensation may reveal a sealing problem later. Recheck the fit after one day of normal use.
| Step | Work Stage | Dimension or Condition to Check | Successful Result | If the Result Is Not Correct | |
|---|---|---|---|---|---|
| 1 | Prepare the Work Area | Interior temperature should remain at or below 4 °C (40 °F) for refrigerated food. | Move food to an insulated container, unplug the appliance when the installation requires access to electrical or powered components, and remove loose items from the drawer area. | The drawer compartment is empty, clean, dry, and safe to access. | Do not force the drawer while loaded. Keep perishable food cold during the work. |
| 2 | Confirm Replacement Fit | Measure drawer width, depth, height, front-panel height, rail location, and stop-tab position in millimetres. | Compare the measured dimensions with the replacement part. Allow approximately 1–2 mm of free clearance at each moving side unless the appliance documentation specifies otherwise. | The drawer body and rail interfaces match without bending, trimming, or excessive side pressure. | Stop installation if the drawer is too wide, too deep, or has a different rail or stop design. |
| 3 | Remove the Old Drawer | Both release stops or end stops must disengage evenly. | Open the drawer fully, lift or press the documented release points, and withdraw the drawer with both hands. Do not twist one side upward. | The drawer comes out without cracking the bin, bending the rails, or pulling the shelf supports out of position. | Recheck the release-stop direction and inspect for hidden clips before applying more force. |
| 4 | Clean and Inspect the Rails | Rails should be free of food residue, ice, broken plastic, and corrosion. Rail height difference should generally be no more than 2 mm from side to side. | Wipe the guides with a soft cloth and mild detergent solution, then dry completely. Check that each guide is firmly seated and parallel to the cabinet. | Both rails move smoothly by hand and remain parallel through their full travel. | Remove ice or debris, reseat loose supports, and replace damaged rails instead of lubricating with cooking oil. |
| 5 | Install the New Drawer | Left and right rail engagement should begin at the same depth, normally within about 3 mm. | Position both sides over the guides, keep the drawer level, and push it inward slowly until the stops or catches engage. | The drawer remains level and seats fully without a loud snap, scraping, or side-to-side rocking. | Pull it out and restart with both rails aligned; never force one rail past its stop. |
| 6 | Align the Front Panel | The top and side gaps should appear even; a practical visual target is approximately 2–4 mm where the surrounding cabinet design permits. | Close the drawer slowly and compare the front panel with adjacent drawers, shelf edges, and cabinet walls. | The front is level, centered, and does not contact the cabinet, door liner, or neighbouring drawer. | Check rail seating, stop tabs, and support height. Remove the drawer before making any approved adjustment. |
| 7 | Check the Seal and Airflow | The drawer should close completely without blocking interior air vents or rubbing the door gasket. | Close the refrigerator door and drawer, then inspect the gasket contact area with a thin sheet of paper. The paper should offer light, continuous resistance around the contact zone. | The drawer closes fully, the gasket is not folded, and no part of the drawer obstructs a vent. | Re-align the drawer, remove obstructions, and inspect for a twisted gasket or an incorrect drawer depth. |
| 8 | Perform the Movement Test | Complete at least 10 open-and-close cycles, including one cycle with a light, evenly distributed load. | Open the drawer to its normal stop and close it at a steady speed. Listen for scraping, clicking, binding, or uneven rail movement. | Movement is smooth and repeatable, the drawer stays level, and it remains closed without drifting open. | Unload the drawer, inspect both rails again, and correct alignment before using it normally. |
| 9 | Final Load and Temperature Check | Do not exceed the appliance's specified shelf or drawer load. Refrigerated food should be held at or below 4 °C (40 °F). | Reload items evenly, keep vents clear, close the drawer, and verify temperature with an appliance thermometer after the refrigerator has stabilized. | The drawer remains aligned under normal load and the compartment maintains the required safe refrigeration temperature. | Redistribute heavy items, clear vents, and investigate poor cooling or incomplete closure before storing food. |
| Measurement note: Dimensions and clearances shown above are practical inspection targets, not universal appliance specifications. The appliance's installation instructions and replacement-part measurements take priority whenever they differ. | |||||